

Last Updated: November 6, 2026
Quick Summary
Trekking poles are lightweight shafts, usually used in pairs, that add two points of contact with the ground and take load off your legs. They reduce impact on knees and joints, improve balance on loose gravel, wet rock or with a loaded pack, and help most on steep descents, rocky tracks and long multi-day walks.
- Two feet plus two poles equals four points on the ground, buying you a moment to correct a slip.
- On flat ground the handle should sit at about hip height with your elbow bent to roughly a right angle.
- A common starting pole length is around 110-120 cm for many adults, adjusted to your height and arm length.
- Shorten both poles by a few centimetres uphill and lengthen them slightly downhill.
- Feed your hand up through the loop from below so the strap carries the load, not your fingers.
Table of Contents
- What Trekking Poles Actually Do for Your Body
- The Benefits of Trekking Poles on Climbs, Descents and Rough Terrain
- How to Use Trekking Poles Correctly
- One or Two Trekking Poles: Which Setup Suits You
- Are Trekking Poles Worth It for Your Hiking Style
- Choosing Pole Materials and Features That Last
- Pairing Your Poles With the Right Camping Gear
- Gear Up for Your Next Walk With Budget Roo
- Frequently Asked Questions
What Trekking Poles Actually Do for Your Body
Trekking poles are lightweight shafts, usually used in pairs, that add two points of contact with the ground and take load off your legs. Trekking poles are best thought of as walking aids first and hiking accessories second.
The core idea is simple. Your legs carry everything. Poles share that job with your arms. What the research does and does not show is worth being clear about, because the honest answer is more useful than the marketing one.
Less impact on knees and joints
Every step downhill sends force through your knee.
Many hikers find the difference most obvious on long descents, where the quads and knees take a beating step after step.
What the evidence supports is narrower than the claims. Research on walking with poles is mixed, and it is much harder to prove that poles prevent injuries in real-world hiking.
It won't make a bad knee good. It does make a long walk home feel shorter, and for many hikers that is the point.
Better balance through extra contact points
Two feet plus two poles equals four points on the ground. That matters more than most people expect.
On loose gravel, wet rock or a loaded pack, that extra support buys you a moment to correct a slip. Hikers with ankle or hip issues often notice this first.
Balance support is the quiet benefit. You rarely feel it working until the day it stops a fall.
Watch out: a pole is a support, not a handrail.
What poles do not do
Poles are not a substitute for fitness, footwear with grip, or judgement about conditions. They do not make a heavy pack lighter, though they can make carrying it feel more stable. And they do not remove the need to shorten your stride and watch your footing on descents. Treat them as one part of a sensible approach to the trail, not a fix for everything. That same practical approach can include considering gear for mobility when uneven ground makes each step more demanding.
The Benefits of Trekking Poles on Climbs, Descents and Rough Terrain
The benefits of trekking poles change with the ground under you. Uphill, they push. Downhill, they brake. On rough ground, they steady.
- Steep ascents: shorter plants give you a push with each step, which eases the load on your calves.
- Downhill hiking: poles act like handrails, reducing knee strain on long drops.
- Uneven terrain: loose rubble and tree roots are where the extra points of contact pay off most.
- Stream crossings: a pole tests depth and gives you a third leg on slippery rocks.
- Heavy packs: a loaded pack shifts your centre of gravity, and poles help you keep posture and rhythm.
The catch is real, though. Poles add weight to your hands and take practice to use well. If you are hiking flat, easy paths, you may not notice much difference.
If you are planning longer or steeper walks, our guide to preparing for multi-day hikes covers the fitness and planning side that poles can't fix.
How to Use Trekking Poles Correctly
Most people get the length wrong and the wrist strap wrong, then blame the poles. Get those two right and the rest follows.
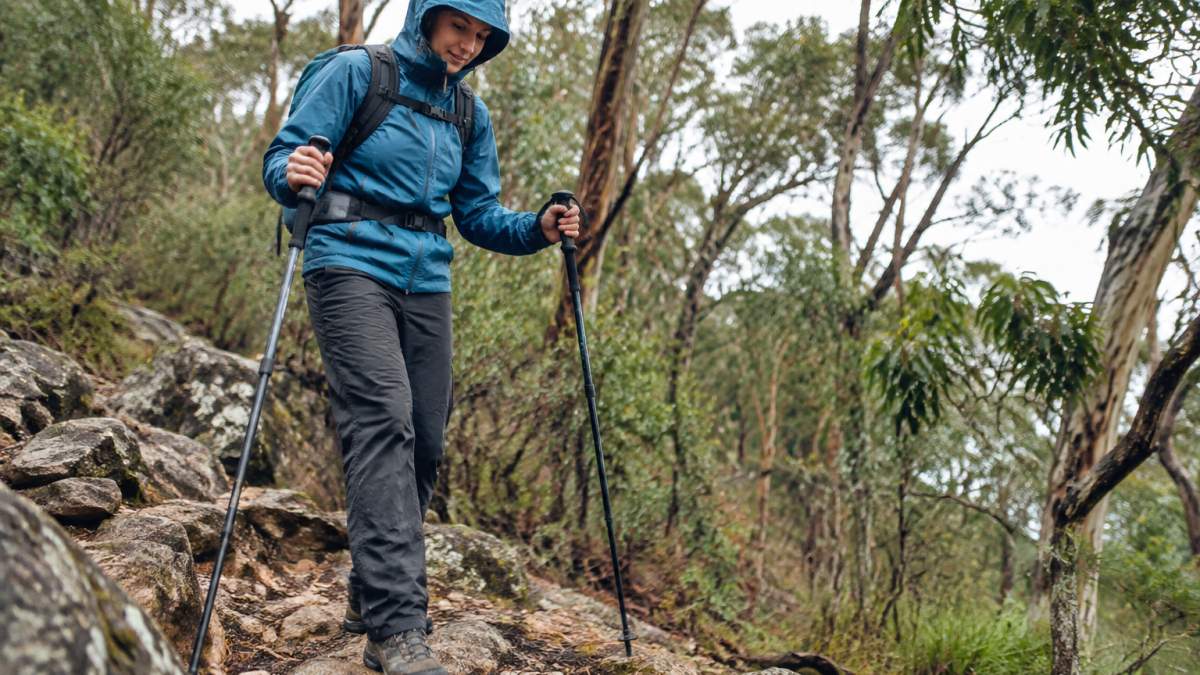
Setting the right length and wrist strap
Stand on flat ground with the pole tip on the deck. The handle should sit at about hip height, with your elbow bent to roughly a right angle.
- Uphill: shorten both poles by a few centimetres so you can plant them closer to your feet and push.
- Downhill: lengthen them slightly for reach so the pole lands ahead of you before your foot does.
- Wrist straps: feed your hand up through the loop from below, then grip over the strap so the strap runs across the base of your palm. The strap carries the load, not your fingers.
That last point is the one most guides skip. Gripping hard all day gives you sore forearms. Letting the strap do the work does not. If the strap is loose enough to slide off your wrist when you open your hand, it is too loose.
Watch out: extending a pole past its marked maximum length can leave the joint weak.
Technique for uphill, downhill and stream crossings
On flat ground, a natural arm swing with a light plant on each opposite step keeps rhythm without wasting energy. You are not trying to pole-vault along a rail trail.
For stream crossings, plant one pole upstream to test the rock, then move. Keep your steps short and move one point of contact at a time.
Watch out: dragging pole tips behind you on hard rock wears them flat fast and gives you no grip when you need it. Lift and plant, every time.
Common technique mistakes to fix early
- Poles too long: you end up reaching forward and hunching, which defeats the posture benefit.
- Poles too short: you stoop over the handles and lose the push on climbs.
- Death grip: fingers wrapped tight around the handle all day cause forearm fatigue; use the strap.
- Swinging from the elbow: the push comes from the shoulder and body weight, not a wrist flick.
- Planting too far ahead on descents: the pole skids rather than brakes; keep it closer to your feet.
A short practice session on a familiar hill is worth more than any guide. Set the length, fit the straps, and walk a few hundred metres before you commit to a long day.
Getting the length and the wrist strap right is most of the battle, so here are the settings and fixes the article calls out.
| Item | Setting or fix | Note |
|---|---|---|
| Handle height on flat ground | About hip height | Elbow bent to roughly a right angle |
| Common starting length | Around 110-120 cm | Adjust to height and arm length |
| Uphill | Shorten both poles a few centimetres | Plant closer to your feet and push |
| Downhill | Lengthen them slightly | Pole lands ahead of your foot |
| Wrist straps | Hand up through loop from below | Strap carries the load, not fingers |
| Poles too long | You reach forward and hunch | Defeats the posture benefit |
| Poles too short | You stoop over the handles | Lose the push on climbs |
| Death grip | Fingers wrapped tight all day | Causes forearm fatigue; use the strap |
One or Two Trekking Poles: Which Setup Suits You
Two poles give you the most stability, the best rhythm and the most load sharing. That makes them the default for steep or rough ground.
One pole suits hikers who want a free hand for a camera, a map or a dog lead. It still helps on descents, just less so.
- Two poles: best for steep gradients, heavy packs and long days.
- One pole: best for easy trails and short walks.
- None: fine on flat, well-formed paths.
A common mistake is buying a single pole to save money, then hiking terrain that really wanted two. If you are unsure, start with a pair.
Are Trekking Poles Worth It for Your Hiking Style
Are trekking poles worth it? For most hikers tackling hills, rough ground or long distances, yes. For flat, short walks, probably not.
They earn their place when the terrain is doing the damage. They add little when it isn't.
- Worth it: steep descents, rocky tracks, multi-day walks, heavy packs, knee or hip niggles.
- Skip them: flat rail trails, short family walks, ultralight hiking where every gram counts.
Older walkers and anyone managing joint pain often get the most out of a pair. Our guide to hiking gear for seniors covers what else is worth prioritising.
Choosing Pole Materials and Features That Last
Aluminium and carbon fibre poles each have trade-offs in weight and durability, so choose based on how hard you are on gear.
- Aluminium: heavier, forgiving, bends rather than breaks.
- Carbon fibre: lighter, less forgiving, better for weight-focused hikers.
- Folding vs telescopic: folding packs smaller, telescopic adjusts more.
- Grips: cork handles sweat well, foam is lighter, rubber grips firmly.
- Tips: carbide tips bite into rock and ice, rubber tips suit paved paths.
Before you commit, run through our seven checks for testing camping gear quality. A quick flex test and a strap tug tell you plenty.
Pairing Your Poles With the Right Camping Gear
Poles only solve half the problem. The rest is what is on your back and under your tent.
If you are carrying a heavy pack, a supportive one can make a significant difference to comfort. Our roundup of the top hiking backpacks for long-distance trekking covers load carriage properly.
For overnight trips, work through our essential camping gear guide so you are not improvising at camp.
A practical pairing for cool-weather trips is a sleeping bag suited to the conditions you expect, paired with a lightweight tent and your poles. For a quick setup, the Weisshorn Instant Up Camping Tent (https://budgetroo.com.au/products/weisshorn-instant-up-camping-tent-4-5-person-pop-up-tents-family-hiking-beach-dome) pops up in one second.

Gear Up for Your Next Walk With Budget Roo
Here is the challenge. Most hikers buy poles, use them badly for one trip, and leave them in the garage. The fix is a pair that fits you, set to the right length, used with the straps properly.
Budget Roo stocks outdoor gear for camping, cooking, fishing and clothing, with a focus on affordability and value.
Start with the right poles and the right pack, and the walk takes care of itself. Get started with Budget Roo and gear up for your next trail day.
Frequently Asked Questions
Do trekking poles reduce strain on your knees?
They can help, particularly on descents where the load through your knees is highest. Placing a pole ahead of you on a downhill step lets your arm share some of that load instead of your knee absorbing all of it. The benefit grows with pack weight and steepness. Poles are not a fix for existing knee pain, so see a physiotherapist if discomfort persists, but many walkers find long descents feel noticeably easier with them.
Are one or two trekking poles better?
Two poles give you the most stability and the most even reduction in leg load, which suits steep descents, heavy packs and rough ground. One pole is lighter and leaves a hand free for a camera, map or scrambling, so it works well on gentler trails and short walks. Try two first if balance is your main concern, and drop to one if you find the second pole gets in the way.
How do you use trekking poles correctly on steep ground?
Set the length so your elbow sits at roughly 90 degrees with the tip on the ground. Going uphill, shorten each pole slightly and plant it behind you to push off. Going downhill, lengthen them and plant ahead for support. Keep the strap across your palm rather than gripping the handle hard, and place poles outside your stride so you do not trip on them.
Are trekking poles worth it for beginners?
For most beginners they are worth trying, especially if you carry a pack or walk on uneven terrain. They add contact points for balance and take some load off tired legs late in the day. The main catch is learning the rhythm, which takes a walk or two. If you are unsure, borrow or buy an affordable pair first and see how your knees and confidence feel on a longer descent.
