

Last Updated: November 10, 2026
Quick Summary
The most essential fishing knots for beginners are the improved clinch knot for attaching hooks and lures, the Palomar knot as the most reliable all-round choice, and the uni knot for joining two lines. Choose knots for holding power first and speed second.
- Knot strength matters more than tying speed, since a fast knot that slips will lose the fish.
- The improved clinch knot works best on lines up to about 10 kg breaking strength.
- If you learn only one knot, make it the Palomar, which holds well on most line types.
- The uni knot shares load across both lines, so the two lines should be reasonably close in diameter.
- Wet every knot and tighten slowly, then test with a firm pull before casting.
Table of Contents
- Why Knot Strength Matters More Than Knot Speed
- The Improved Clinch Knot for Hooks and Lures
- The Palomar Knot: The Most Reliable Beginner Choice
- Joining Two Lines With a Uni Knot
- Fishing Line to Line Knots for Leaders and Repairs
- Troubleshooting Slipping, Tangled and Weak Knots
- Practice These Knots Before Your Next Trip
- Frequently Asked Questions
Why Knot Strength Matters More Than Knot Speed
Most beginners judge fishing knots by how fast they can tie them. That's the wrong measure. A knot that ties in ten seconds but slips under load will cost you a fish, and possibly the lure too. Essential fishing knots for beginners should be picked for holding power first, then speed.
Knots fail in three common ways: slipping, cutting into the line, or loosening after a fish pulls hard. A well-tied knot avoids all three. Speed comes second, once the knot holds reliably every time you tie it.
Keep in mind that a rushed knot is a weak knot. Take the extra thirty seconds to wet the line, seat each turn, and pull the knot tight slowly.
The Improved Clinch Knot for Hooks and Lures
The improved clinch knot is the first knot most anglers learn, and for good reason. It attaches a line to a hook, swivel, or lure eye quickly and holds well on monofilament.
It works best on lines up to about 10 kg breaking strength. Heavier braid can slip through it unless you add extra turns.
Step-by-Step Tying Method
- Thread the line through the hook or lure eye, leaving a tag end of about 15 cm.
- Wrap the tag end around the standing line five to seven times.
- Pass the tag end through the small loop just above the eye.
- Pass it back through the big loop you just created.
- Wet the knot with saliva or water, then pull the standing line and tag end slowly to tighten.
- Trim the tag end close to the knot.
Watch out: Yanking the knot tight in one go can leave the turns crossed and weak. Tighten slowly so the coils stack neatly.
The Palomar Knot: The Most Reliable Beginner Choice
If you learn only one knot, make it the Palomar. It is simple to tie, holds very well on most line types, and handles many lure weights.
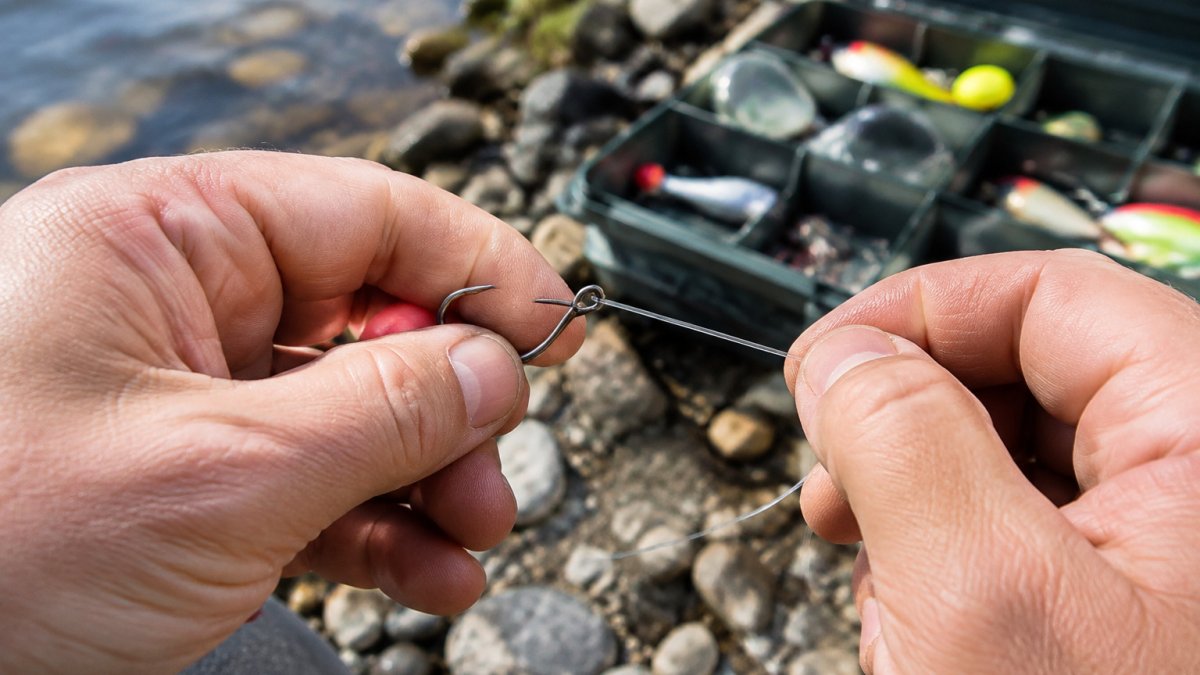
The Palomar works by doubling the line through the eye before tying a simple overhand loop, which gives it a strong grip on the hook.
Tie it by folding a loop, passing the loop through the hook eye, tying an overhand knot with the doubled line, then sliding the loop over the hook. Pull both ends to set it.
The Palomar is the knot the article recommends if you learn only one, and its main steps are summarised below.
| Step | What to do | Note |
|---|---|---|
| Fold loop | Fold the line into a loop | Start with a doubled line |
| Pass through eye | Pass the loop through the hook eye | Loop goes through the eye |
| Tie overhand | Tie an overhand knot with the doubled line | Forms the grip on the hook |
| Slide and set | Slide the loop over the hook, then pull both ends | Pull both ends to set it |
Joining Two Lines With a Uni Knot
The uni knot joins two lines, most often braid to a monofilament or fluorocarbon leader. It is a popular choice for line-to-line connections because it grips both lines with the same set of coils, so the load is shared rather than concentrated on one strand.
The knot holds because the tag end wraps around both standing lines inside a loop. When you pull the standing lines, the coils bite into each other and lock. This is also why it fails when the coils are loose or uneven: a single slack wrap means the load falls onto fewer turns, and those turns can slip.
Matching the materials
The uni knot handles braid-to-mono well, but the two lines should be reasonably close in diameter. Compare braided and monofilament line to see how their diameters and handling differ before you choose which to connect. A very thick leader against a fine braid will bunch the coils on one side and reduce grip. If the diameters differ a lot, a double surgeon's knot or a dedicated leader knot is usually more predictable.
Tying sequence
Lay the two lines side by side, with the tag end of one line crossing over the other. Make a loop around both lines with that tag end, then wrap the same tag end through the loop six to eight times, keeping each wrap flat and lined up beside the last. Pass the tag end back through the loop in the same direction. Wet the knot, then pull the two standing lines in opposite directions, one at a time, to seat the coils.
Checking the result
Before you trust the connection, run a finger along the wraps. They should sit snug and parallel without crossing. Pull each line firmly and watch the coils: if they move or spread, retie. Trim the tags only after a test pull, since a tag that slips will show up under load.
Watch out: Overlapping coils are the most common reason a uni knot slips, and they are easy to miss by eye. Feel the wraps as well as looking at them.
Fishing Line to Line Knots for Leaders and Repairs
Knots that connect two lines are useful for leaders, repairs and joining different materials. Beyond the uni knot, a double surgeon's knot is quick and strong for joining lines of similar thickness.
Repairs are where these knots earn their keep. Learn how to keep your gear in good condition so fewer knots fail in the first place. A quick line-to-line join can save a trip when a section of line frays or breaks.
When joining lines of very different diameters, a uni knot usually holds better than a double surgeon's.
Troubleshooting Slipping, Tangled and Weak Knots
Most knot failures trace back to a small set of mechanical causes. Knowing why a knot failed matters as much as knowing how to tie it, because the same mistake will keep showing up until the cause is fixed.
Why knots slip
A knot holds when its coils grip each other and the line under load. Slipping happens when that grip is weak. Common reasons include too few turns on slick braid, which has little friction to lock the coils; tag ends trimmed too short, which allow the knot to unwind; and coils crossed during tightening, which bunch the load onto a few strands.
Why knots weaken
Friction burn is the most common hidden cause. Pulling a dry knot tight generates heat that can weaken monofilament and fluorocarbon at the knot. Wetting the line first reduces this heat. Line memory and kinks also matter: old or coiled line loses strength at bends, so a knot tied in a kinked section can fail well below the rated breaking strength.
Recovering from a bird's nest or wind knot
A tangle is easier to fix when you stop pulling. Lay the line out, find the loop that is crossing over the others, and work it open slowly with your fingers, not by yanking. If the tangle is tight, loosen it with a little lubricant and small movements. If the line is badly knotted or kinked at a critical point, cutting out the damaged section and retying is often faster and safer than trying to untangle it, especially with braid, which can hide a weakened section.
Resetting a knot that failed
If a knot slipped or weakened during a test, do not reuse it. Cut the line back past the damaged section, check the cut end for fraying, and retie from fresh line. A knot that has already been stressed rarely recovers its full strength.
A quick diagnostic routine
After tying, run through three checks: count the turns, feel for even coils, and perform a firm test pull. If any check fails, retie rather than adjusting. Repeating this routine builds the habit that prevents most failures on the water. Find out why lures and tackle wear out and how to repair them if your knots keep failing.
Practice These Knots Before Your Next Trip
Tie each knot at home a dozen times before you rely on it on the water. Use a spare hook and a short length of your normal line. Practice tying knots in low light or with cold hands, since those are the conditions where mistakes happen.
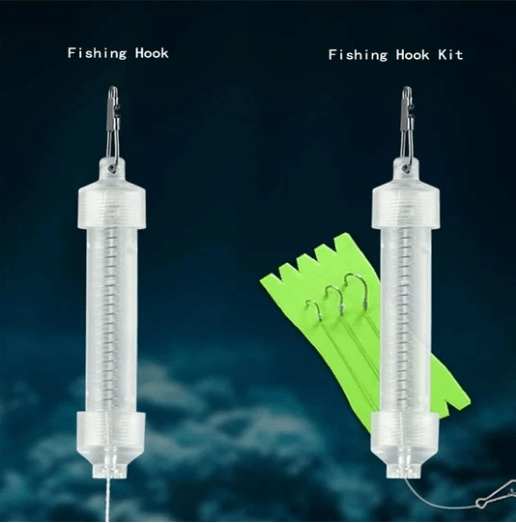
Once the knots feel automatic, pair them with the right lures for your target fish. See which lures work best for bream in rivers before you head out. The automatic fishing hook from Budget Roo has a 1 to 20 kg tension rating and a stainless steel spring, and it is available for $18.87.
Test every knot with a firm pull before you cast. A knot you have tested is one you can trust.
BUTTON: Shop Fishing Gear Now CARD_TITLE: Ready to rig up your first setup? CARD_TEXT: Budget Roo Pty Ltd stocks affordable fishing gear for beginners and weekend anglers.
Frequently Asked Questions
What are the easiest fishing knots for beginners?
The Palomar knot and the improved clinch knot are the two easiest fishing knots for beginners. The Palomar is strong, simple to tie and works well with braided and monofilament line. The improved clinch knot is the classic choice for attaching hooks, swivels and lures. Learn these two first, practise them at home with a length of line and a spare hook, and you can handle most common rigging situations on the water.
How do you tie a fishing knot to a hook?
For most hooks, tie an improved clinch knot: pass the line through the eye, wrap the tag end around the standing line five to seven times, feed the tag end through the loop above the eye, then through the big loop formed at the bottom, and moisten the knot before pulling it tight. Trim the tag end close. A Palomar knot is an equally good option, especially for lures and heavier line.
How can you tell if a fishing knot is secure?
A secure knot has tight, neatly stacked coils with no gaps, and the line does not slip when you tug firmly on both sides. Check that the wraps sit side by side rather than crossing over each other. Before casting, pull the hook or lure hard against a fixed point and watch for any movement in the knot. Retie any knot that slips, looks loose or shows nicks or frayed line.
Should you wet a fishing knot before tightening it?
Yes. Moistening the knot with saliva or water before you pull it tight reduces friction, which prevents the line from being scorched or weakened as you cinch it down. Wetting the knot also helps the coils seat evenly, so the final knot is smoother and more reliable.
