

Table of Contents
- The 10 Essentials for Hiking: Your Beginner Gear Checklist
- Budget-Friendly Footwear and Clothing Layers
- Choosing a Lightweight Backpack and Sleeping System
- Beginner Camping Cooking Gear Essentials
- Tips for Buying Second-Hand Outdoor Equipment
- How to Save Money on Affordable Outdoor Gear for Beginners
- Essential Navigation and Safety Tools for New Hikers
- Conclusion: Build Your Kit One Trip at a Time
- Frequently Asked Questions
Last Updated: September 13, 2026
The 10 Essentials for Hiking: Your Beginner Gear Checklist
The fastest way to waste money on affordable outdoor gear for beginners is buying a full kit before your first overnight trip. Most beginners overspend on items they rarely use and underspend on the ones that keep them safe. This guide from Budget Roo Pty Ltd breaks down what you actually need, what you can borrow, and how to build a kit one trip at a time.
The ten essentials are a framework, not a shopping list. They cover navigation, sun protection, insulation, illumination, first aid, fire, repair tools, nutrition, hydration and emergency shelter. You can satisfy every category without buying ten separate products.
Bushwalking safety guidance from the state national parks services recommends carrying these items on every walk, even short ones. The key insight most guides miss: your phone counts as navigation only if you carry a charged power bank and a paper backup.
What Belongs in Every Day Pack
Start with what you already own. A day pack needs water, snacks, a rain shell, a headlamp, a basic first aid kit and a warm layer. Add a whistle and a space blanket for emergency preparedness. That covers six of the ten essentials for under $100 if you shop carefully.
A common mistake is buying a heavy multi-tool you'll never use instead of a simple repair kit with tape, a zip tie and a spare buckle. The repair kit costs less and solves more problems on the trail.
Budget-Friendly Footwear and Clothing Layers
Footwear is where the cost-per-use maths flips. A $60 pair of trail shoes worn twice before they fall apart costs $30 a trip; a $220 pair of properly fitted boots worn 40 times costs $5.50 a trip. That is the single most useful calculation a beginner can run, and it is why footwear is the one category where spending more usually saves money. Blisters end trips faster than cold or hunger, and cheap boots that don't fit will ruin a weekend long before the tread wears out.
Fit matters more than brand. Shop late in the day when your feet are swollen, wear the socks you'll hike in, and leave a thumb's width between your longest toe and the front of the boot. A heel that lifts more than a few millimetres will rub. Look for traction suited to your terrain, a softer rubber compound grips rock better, a harder one lasts longer on gravel, and choose a waterproof membrane only if you walk in wet or boggy conditions, because it also reduces breathability in heat.
Layering does more for warmth than any single jacket, and it is the cheapest place to build versatility. A base layer moves moisture away from your skin, a mid-layer traps heat, and a shell blocks wind and rain. Synthetic insulation keeps working when damp, which matters in unpredictable weather; down is warmer for its weight but loses loft when wet and costs more.
- Base layers: moisture-wicking synthetic or merino, avoid cotton, cotton holds water and chills you
- Mid-layer: fleece or light synthetic jacket for breathability; grid fleece breathes better than solid fleece
- Shell: waterproof and windproof outer layer; look for taped seams and a hood that fits over a beanie
- Extras: beanie, gloves and spare socks in a dry bag, spare socks are the cheapest comfort upgrade you can carry
Buy entry-level versions of each layer first, then upgrade the piece you wear most once you know how you actually hike. A common pattern is that beginners over-invest in a shell and under-invest in socks and a warm mid-layer, then discover the shell was the least-used item on a dry weekend.
Climate Changes What You Buy
Generic kit lists ignore where you walk, and that is where beginners waste the most money. In humid, warm conditions, breathability beats waterproofing, a fully waterproof shell becomes a sauna, and quick-dry synthetic layers matter more than insulation. In alpine or cold, wet conditions, the priority reverses: a reliable shell, a warmer mid-layer and a sleeping system rated below the expected overnight low matter more than saving weight. Coastal and exposed walks reward windproofing over insulation. Before you buy anything, write down the coldest night and the wettest day you realistically expect in the next 12 months, and buy for that, not for the brochure trip you may never take.
Choosing a Lightweight Backpack and Sleeping System
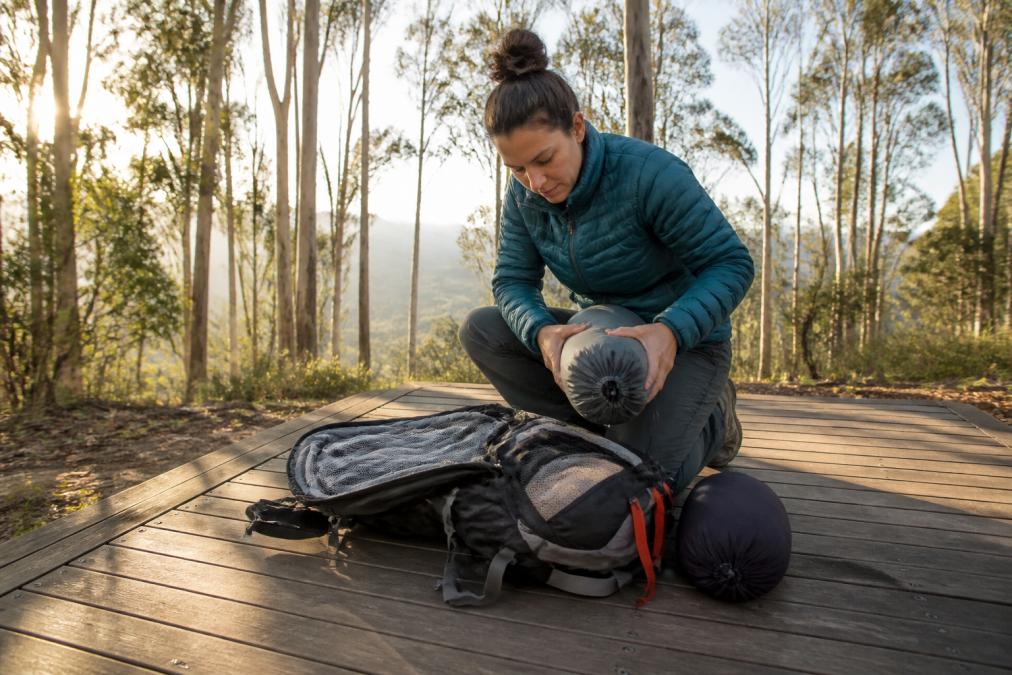
Pack weight drives comfort more than any other decision, and it is also where rental and borrowing make the most sense for a beginner. Aim for a total pack weight under 12kg for a weekend trip, including water and food. A lightweight backpack in the 50-65 litre range suits most beginners and leaves room for a shelter system. Fit matters as much as volume: load-lifter straps should sit on the top of your hips, the hip belt should carry most of the weight, and the pack should sit close to your back without sagging.
Before you buy a pack or a sleeping system, run the cost-per-use test. Divide the purchase price by the number of nights you'll realistically sleep out in a year. A $300 sleeping bag used twice costs $150 a night; the same bag rented at $25 a night costs $50 for two nights. Many outdoor clubs and some councils run gear libraries where members borrow tents, packs and stoves for free or a small fee, and rental shops stock beginner kits for a fraction of the purchase price. If you're still testing whether you enjoy overnight hiking, rent first, the money you save funds the boots that actually matter.
For sleeping, you're choosing between bags and quilts. A sleeping bag is simpler and warmer for beginners because it wraps you fully and is harder to draft. A quilt saves weight and money but requires a good sleeping pad to work, because the pad supplies the insulation underneath you. Match your bag rating to the coldest night you expect, then add a margin, a bag rated to 0°C is comfortable to roughly 5°C for most sleepers, and comfort ratings are more useful than extreme ratings.
The Weisshorn Sleeping Bag is a practical starting point for casual campers. It uses 300g/m² hollow fibre filling and a 190T polyester ripstop outer, so it handles cool nights without the price of down. Pair it with a sleeping pad rated for the season and you have a complete, cost-effective system. Synthetic fill also tolerates damp better than down, which suits humid or coastal camping where condensation is common.

Beginner Camping Cooking Gear Essentials
Cooking gear is where beginners overspend most. You need one heat source, one pot, one mug and one utensil set. That's it for a weekend. A portable stove or small grill covers boiling, frying and reheating, and a multi-purpose pot doubles as a bowl.
The Grillz Charcoal BBQ Grill folds flat, runs on charcoal and gives you even cooking for group meals. Budget Roo customers regularly mention even heat and a friendly interface as the reasons they keep using it. Add a 32OZ Tumbler for hot drinks and cold water, and your kitchen kit is complete for around $87.

- Heat source: portable grill, gas stove or campfire (check local fire rules)
- Cookware: one pot, one pan, folding utensils
- Extras: lighter, spare fuel, small wash kit, rubbish bags
Test your cooking setup in the backyard before you rely on it. You'll spot the missing item before it matters.
Tips for Buying Second-Hand Outdoor Equipment
Second-hand gear stretches a beginner budget further than any sale. The categories worth buying used are hard goods: packs, tents, pots, trekking poles and headlamps. Avoid used footwear unless it's barely worn, and skip second-hand sleeping bags unless you can verify the fill and cleanliness.
Inspect before you pay. Check zips, seams, pole sections and waterproof coatings. Ask how many trips the item has done and whether it's been stored dry. A tent that smells musty has likely been packed wet, and that means mildew in the fabric.
Gumtree, Facebook Marketplace and local gear swaps are the usual sources. Meet in person, test the item, and pay cash. If a seller won't let you inspect the item properly, walk away.
How to Save Money on Affordable Outdoor Gear for Beginners
The biggest saving isn't a discount code. It's buying less, later. Build your kit around the trips you actually take, and rent or borrow the rest until you know you'll use it. That approach cuts first-year spending dramatically and stops you storing gear you never touch.
Gear Rental, Library Programs and Cost-Per-Use
Run the numbers before you buy anything used less than a few times a year. Cost-per-use is simple: divide the purchase price by the number of trips you'll realistically take in a year. A $300 tent used twice costs $150 per trip. The same tent rented at $30 a night costs $60 for two trips.
Many outdoor clubs and some councils run gear libraries where members borrow tents, packs and stoves for free or a small fee. Rental shops also stock beginner kits for a fraction of the purchase price. If you're testing whether you even enjoy overnight hiking, rent first.
Budget Roo's range of affordable outdoor gear for beginners is priced so that entry-level buyers aren't forced into the rental-versus-buy trade-off. The Weisshorn Family Camping Tent, for example, is a four-person shelter at a price that makes cost-per-use math work from the first trip.

Essential Navigation and Safety Tools for New Hikers
Navigation and safety tools are non-negotiable, even on short walks. Carry a paper map and compass as your primary navigation, a charged phone as backup, and a headlamp with spare batteries. A satellite messenger is worth the cost if you hike alone or outside phone coverage.
Emergency preparedness advice from the Australian Red Cross recommends telling someone your route and expected return time before every trip. That single habit does more for your safety than any gadget.
Your first aid kit should cover blisters, cuts, sprains and insect bites. Add any personal medication and a snake bandage if you walk in areas where snakes are common (healthdirect.gov.au). Check expiry dates each season and replace what's expired.
- Navigation: map, compass, phone with offline maps, power bank
- Lighting: headlamp plus spare batteries
- Communication: satellite messenger for remote areas
- First aid: blister care, bandages, personal medication, emergency blanket
Conclusion: Build Your Kit One Trip at a Time
The hardest part of buying affordable outdoor gear for beginners isn't finding cheap products. It's resisting the urge to buy everything at once. Start with the ten essentials, rent or borrow the rest, and add one piece after each trip based on what you actually missed.
Budget Roo stocks entry-level gear designed for exactly this approach, from the Weisshorn Family Camping Tent to the Grillz Charcoal BBQ Grill and the Camping Hammock with Mosquito Net. Every item ships free and is priced to keep your first kit within reach. Shop now and build your kit one trip at a time.
Frequently Asked Questions
Where can I find affordable outdoor gear for beginners?
Start with retailers that stock entry-level camping and hiking ranges, and check end-of-season sales for last year's colours. Budget Roo stocks a Weisshorn 4 Person Tent at $102.95 and a Weisshorn 5 Degree Sleeping Bag at $101.95, both with free shipping. Op shops, online marketplaces and gear library programs are also worth checking. Buy the big-ticket items first (shelter and sleep system), then add smaller pieces as you work out what you actually use.
What are the basic outdoor gear items I need for my first trip?
The essential hiking gear checklist for beginners covers ten items: navigation (map and compass or a charged phone), a headlamp with spare batteries, sun protection, first aid kit, a knife or multi-tool, fire starters, emergency shelter, extra food, extra water, and extra clothing layers. For an overnight trip, add a tent, sleeping bag, sleeping mat and a backpack that fits your torso length. You do not need premium versions of any of these to start.
Are budget outdoor brands reliable for beginners?
They can be, as long as you check the specifications rather than the price tag. Look for a waterproof rating on tents, a temperature rating on sleeping bags, and a stated fill or insulation type. A 190T polyester rainfly with a double-layer construction, for example, handles typical weekend rain. The main trade-offs at lower prices are weight and long-term durability, not basic function. Read reviews that mention multi-trip use.
How can I save money on camping and hiking equipment?
Three approaches work well. First, buy second-hand for hard goods like pots, stoves and trekking poles, which hold up well and lose value fast. Second, rent or borrow the items you use once or twice a year, such as a large tent or a four-season sleeping bag. Third, calculate cost-per-use: a $100 sleeping bag used 20 nights costs $5 a night, which beats a $40 bag you replace every season.
Is it better to rent or buy outdoor gear as a beginner?
Rent first if you are unsure whether you will stick with the hobby. Many outdoor clubs and some retailers run gear library programs where members borrow tents, packs and stoves for a small fee. Once you have done three or four trips and know what you like, buy the items you use every time. Rent or borrow the rest. This keeps your initial spend low while you learn what suits your trips.
What should I prioritise when buying my first outdoor gear?
Spend on the three items between you and the ground: footwear, sleeping mat and sleeping bag. Poor footwear causes blisters that end trips early, and a mat with a low R-value lets cold seep up through your bag. Budget versions of tents, cookware and clothing work fine for fair-weather weekend trips. Add navigation and safety tools next, then upgrade comfort items as your experience grows.
How do I check second-hand outdoor equipment before buying?
Inspect seams and zippers on tents and sleeping bags, and ask how many nights the item has been used. For sleeping bags, check the loft (how much it springs back when compressed) and whether it has been washed correctly. For stoves, ask for a demonstration or a video. Check that waterproof coatings are intact rather than flaking. Avoid anything with repaired structural damage, such as a patched tent pole or a resewn shoulder strap.