

Table of Contents
- How Your Body Loses Heat in a Tent
- Step 1: Get Your Cold Weather Camping Clothing Layers Right
- Step 2: Choose the Best Insulated Jackets for Winter Nights
- Step 3: Learn How to Insulate a Tent Floor Before You Sleep
- Step 4: Pick a Sleeping Bag and Pad That Match the Forecast
- Step 5: Manage Condensation, Ventilation and Campsite Choice
- Step 6: Eat, Drink and Move to Keep Your Core Temperature Up
- Step 7: Emergency Cold-Weather Protocols and Gear Care
- Frequently Asked Questions
Last Updated: September 18, 2026
How Your Body Loses Heat in a Tent
Cold camping nights rarely come down to one bad piece of gear. They come down to heat escaping in four different ways at once. Understanding those paths is the fastest route to fixing them, and it is where most tips for staying warm camping go wrong.
The Four Ways Heat Escapes
Your body loses heat through radiation, conduction, convection and evaporation. Each one needs a different fix.
- Radiation: warmth leaves your body and hits cold air. Fix it with insulation around you.
- Conduction: heat drains into whatever you touch. Fix it with a barrier under you.
- Convection: moving air steals warmth. Fix it by blocking draughts.
- Evaporation: sweat cools you down. Fix it by staying dry.
Step 1: Get Your Cold Weather Camping Clothing Layers Right
Cold weather camping clothing layers work as a system, not a single item. Each layer has one job, and wearing the wrong one to bed undoes the rest.
Base, Mid and Shell: What Each Layer Does
- Base layer: sits against your skin and moves sweat away. Merino wool or a synthetic fabric works well.
- Mid layer: traps warm air. Fleece or a light puffer does this.
- Shell: blocks wind and light rain while still letting vapour escape.
This is your layering system in its simplest form. Get it right and your body does most of the work for you.
The Layer You Sleep In Is Not the Layer You Hike In
Here is the mistake that ruins sleep. People climb into a sleeping bag wearing the same damp base layer they sweated in all day.
Step 2: Choose the Best Insulated Jackets for Winter Nights
The best insulated jackets for winter keep your core warm without trapping sweat. For most campers, a synthetic fill jacket is the safer pick because it keeps working when damp.
Down vs Synthetic: Which Insulation Suits Your Trip
| Feature | Down | Synthetic |
|---|---|---|
| Warmth for weight | Higher | Lower |
| Performance when wet | Poor | Good |
| Drying time | Slow | Fast |
| Cost | Higher | Lower |
| Best for | Dry cold | Damp, humid nights |
Down offers more warmth per gram, measured as fill power. Synthetic fill handles moisture better and costs less. If you camp in humid conditions, synthetic wins.
Step 3: Learn How to Insulate a Tent Floor Before You Sleep
Learning how to insulate a tent floor is the single highest-value fix for a cold night. The ground steals heat through conduction, and a sleeping bag alone cannot stop it.
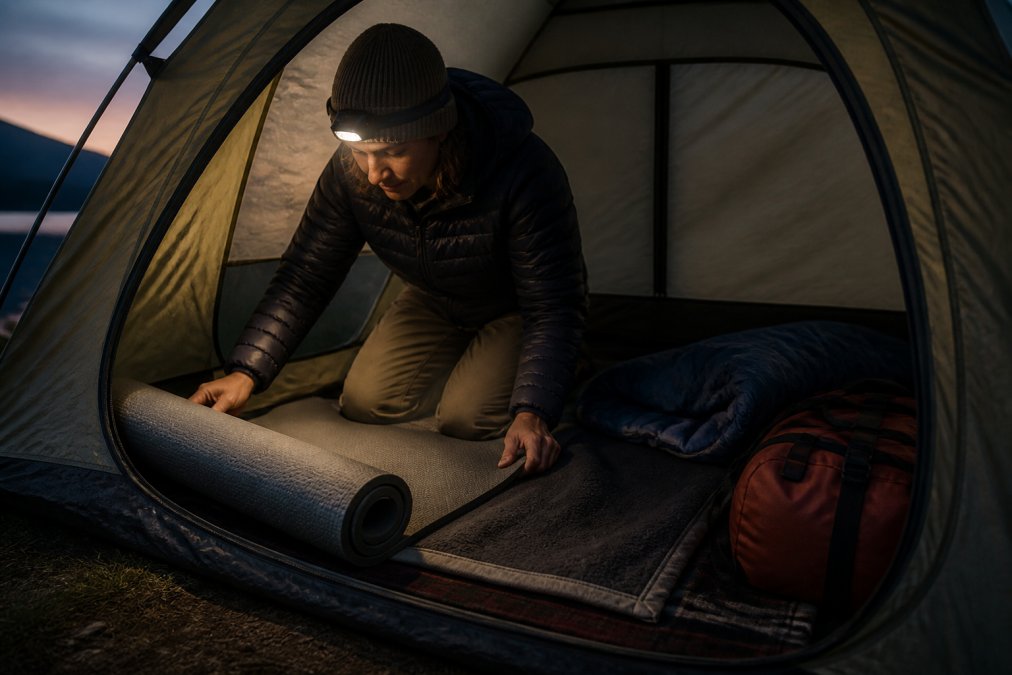
Cheap and Effective Floor Insulation Ideas
- A closed-cell foam mat under your sleeping pad
- A reflective emergency blanket laid shiny side up
- Cardboard or a thick wool blanket as a base layer
- A spare doona folded double under your hips
Stack two thin layers rather than one thick one. Trapped air between them adds insulation. This is a budget-friendly DIY insulation hack that works as well as gear you would pay far more for.
Step 4: Pick a Sleeping Bag and Pad That Match the Forecast
A sleeping bag and pad must match your forecast, not your optimism. This is where most campers get it wrong: they buy a bag rated for the coldest temperature they might see, then pair it with a thin foam mat that lets the ground drain heat all night. The bag cannot compensate for the pad.
Read the Temperature Ratings Properly
Sleeping bag labels usually carry three numbers, and only one of them matters for comfort:
- Comfort rating: the temperature at which an average adult woman can sleep comfortably. This is the number to plan around.
- Lower limit: the temperature at which an average adult man can sleep without waking from cold. Treat this as your realistic floor, not your target.
- Extreme rating: a survival figure only. It assumes you are curled up, shivering, and not sleeping. Never plan a trip around this number.
The R-Value Is the Number Most Campers Ignore
Your sleeping pad carries an R-value, which measures how well it resists heat loss. The higher the number, the more it blocks the cold ground from pulling heat out of you. A sleeping bag's fill only insulates the air above and around you; the pad handles everything below.
A practical guide for Australian conditions:
- R-value 1-2: summer only, warm nights, minimal ground chill
- R-value 2-3.5: three-season camping, mild to cool nights
- R-value 3.5-5: cold nights, alpine areas, frost expected
- R-value 5+: snow, sub-zero, or if you sleep cold
Match the Bag to the Pad, Not the Other Way Around
A common pattern is a camper with a well-rated bag who still shivers because their pad is too thin. If your bag is rated to 0°C comfort but your pad is R-value 1.5, the ground will win. Fix the pad first, it is usually the cheaper upgrade and the bigger gain.
Step 5: Manage Condensation, Ventilation and Campsite Choice
Condensation forms when your warm breath meets a cold tent wall. Left alone, it soaks your gear and kills insulation.
Campsite selection matters too. Follow these rules:
- Pitch on high, dry ground, never in a hollow where cold air pools
- Shelter from wind, since wind chill strips heat fast
- Avoid low spots near creeks or dams
- Face your door away from the prevailing wind
Step 6: Eat, Drink and Move to Keep Your Core Temperature Up
Your body makes its own heat through metabolism. Feed it and it rewards you.
Step 7: Emergency Cold-Weather Protocols and Gear Care
Most camping guides stop at gear. This section covers what to do when the gear is not enough, and how to keep that gear working when temperatures drop below zero.
Recognise the Stages of Cold Injury Early
Cold injuries progress in stages. Catching them early is the difference between a uncomfortable night and a hospital trip.
Hypothermia, watch for the 'umbles':
- Mumbles: slurred speech, confusion
- Stumbles: loss of coordination, tripping
- Fumbles: dropping things, clumsy hands
- Grumbles: irritability or irrational behaviour
- Bumbles: stumbling gait
- Tumbles: collapse
Frostbite, watch the extremities:
- Early sign: numbness, pins and needles, pale or waxy skin
- Later sign: skin feels hard, looks grey or white, and does not bounce back when pressed
Field-Expedient Warming Techniques
If someone is cold and shivering but still alert, act fast with what you have:
- Get them out of the wind and onto insulation. A foam mat or a folded blanket under them stops ground conduction immediately.
- Remove wet layers and replace them with dry ones. If no dry clothes are available, put the wet person inside a sleeping bag with a warm, dry person, shared body heat is one of the fastest field rewarming methods.
- Warm the core first, not the extremities. Heat the chest, neck, armpits and groin. Warming hands and feet first pushes cold blood back to the core and can worsen the situation.
- Use skin-to-skin contact for the core area if you have no other heat source. A warm water bottle wrapped in a sock or shirt against the chest works well.
- Give warm, sweet drinks if the person is fully alert and able to swallow. Never give alcohol, it widens blood vessels near the skin and accelerates heat loss.
- Do not rub frostbitten skin or apply direct heat such as a flame, hot water, or a hot rock. Slow rewarming with body heat is safer.
Gear Care in Extreme Cold
- Zippers: wax or silicone lubricant on sleeping bag and tent zips stops them freezing shut. Never force a stiff zip, warm it with your hand first.
- Batteries: lithium batteries lose a large share of their capacity below freezing. Keep power banks and headlamp batteries in an inside pocket close to your body, and swap them into the device only when needed.
- Stoves: canister stoves lose pressure in the cold. Keep the canister warm inside your jacket before use, or use a stove with a preheat tube. Never use a stove inside a tent, carbon monoxide is a silent risk.
- Sleeping bags: air and dry your bag fully after every trip before storing it. Store it loose, never compressed in its stuff sack. A bag that once kept you warm will stop working if the fill loses loft.
- Heated gear: hand wash insulated and heated items in warm water as directed, and check seams and zips before each cold trip.
The psychological side of cold tolerance deserves a mention too. Anxiety makes you tense, and tension reduces blood flow to your skin. Settling in calmly, with a routine you trust, genuinely helps you sleep warmer.
Frequently Asked Questions
How cold is too cold to sleep in a tent?
There is no fixed cut-off, because your gear decides the limit. A 5-degree rated bag paired with a high R-value pad and proper layers can keep you comfortable near freezing, while a summer bag on bare ground gets cold well above zero. Watch for shivering that will not stop, numbness or confusion, and treat these as signs to add insulation or move to a warmer shelter. A thermometer inside the tent tells you more than the forecast.
What are the best clothing layers for cold weather camping?
Start with a merino wool or synthetic base layer to move sweat away from your skin, add a fleece or light insulated mid layer for warmth, then a windproof shell. Keep a dry set of thermals reserved for sleeping only, because damp day clothes pull heat out of you overnight. Add a beanie, gloves and warm socks, since extremities cool first. Adjust layers before you sweat, not after.
How do you keep your sleeping bag warm at night?
Your body heats the bag, so give it less work to do. Insulate underneath with a mat rated for the conditions, wear dry thermals, and eat a snack before bed for metabolic heat. Loosen the hood and draft collar so your breath escapes rather than condensing inside. A sleeping bag liner adds warmth, and a hot water bottle filled from your stove takes the edge off the first hour.
Does insulating a tent floor really make a difference?
Yes. Cold ground pulls heat from your body far faster than cold air does, so the floor is where most warmth disappears. Adding a foam mat, an extra blanket or a purpose-made floor layer under your sleeping pad raises the effective R-value and cuts that loss. It also protects the pad from punctures and keeps condensation off your gear, which matters on multi-night trips.
Cold nights test your gear and your planning at the same time. Budget Roo Pty Ltd stocks the layers, bags and heated apparel that make those nights comfortable, all at prices that do not stretch the budget. Browse the camping range to find insulation, sleeping gear and heated jackets built for real conditions. Get started with Budget Roo Pty Ltd and turn a shivering night into a proper sleep.