

Last Updated: October 31, 2026
Quick Summary
To install a dual battery system in a 4WD, mount a second battery in a cool, secure spot, then connect it to a DC-DC charger that takes alternator input and charges the auxiliary battery. Run fused positive cable from the starter battery, use a dedicated earth return, and fit fuses at both ends.
- A DC-DC charger suits most modern 4WDs, while an isolator is simpler and cheaper for older vehicles.
- Keep voltage drop under about 3% by sizing cable for the charger's maximum input current.
- Fit a fuse within 300mm of the starter battery positive terminal on the main run.
- Mount the auxiliary battery as close to the charger as practical, in a cool, dry, secure spot.
- Test charging voltage at the auxiliary battery before your first trip.
Table of Contents
- What a Dual Battery System Does and Why Your 4WD Needs One
- Dual Battery Isolator vs DC-DC Charger: Which Charging Setup Fits Your Vehicle
- Choosing Your Battery Type and Capacity Before You Buy
- Where to Mount the Second Battery: Under-Bonnet, Canopy, Tub or Cabin
- Dual Battery System Cable Size, Fuses and Voltage Drop
- Step-by-Step DC-DC Charger Installation and Wiring Sequence
- Dual Battery System Wiring Diagram: What Each Connection Does
- Commissioning, Testing and Troubleshooting Your New Setup
- Frequently Asked Questions
What a Dual Battery System Does and Why Your 4WD Needs One
A dual battery system is a second battery, charged from your vehicle's alternator, that runs your fridge, lights and camp gear without flattening the battery that starts the engine.
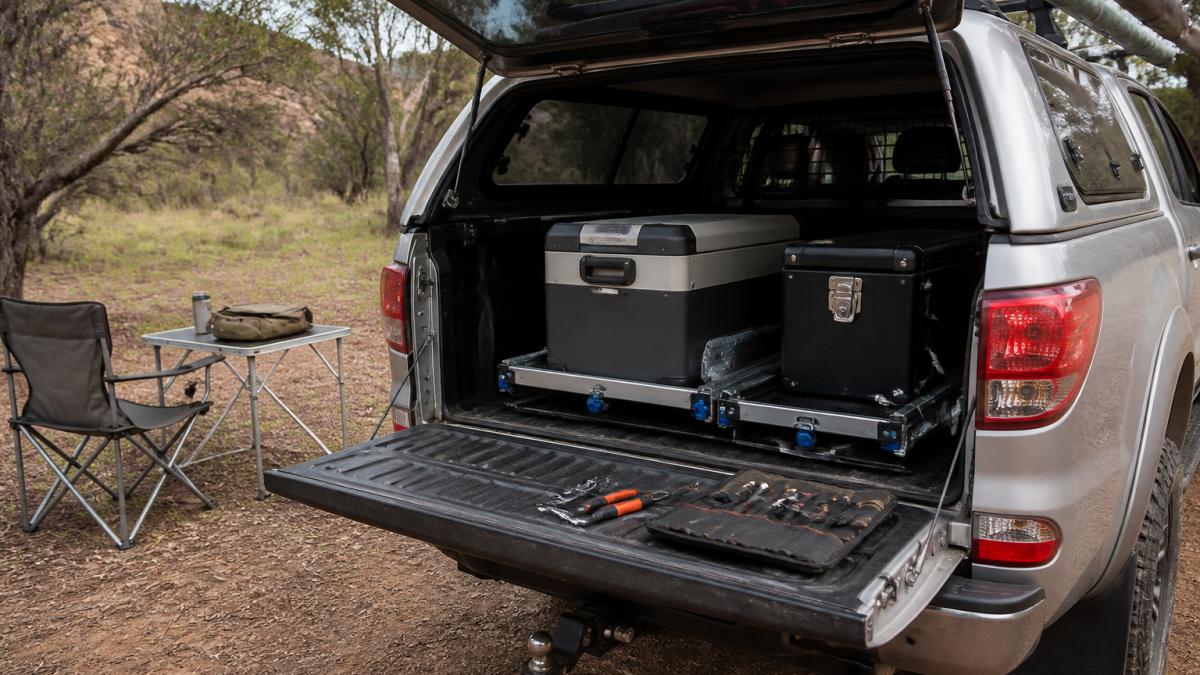
Here's the problem. A portable fridge chest freezer is a typical load an auxiliary battery is meant to carry.
An auxiliary battery fixes that. It carries the slow, steady load so the starter stays full.
Starter Battery vs Auxiliary Battery Roles
The starter battery delivers high current for a few seconds. It's designed to sit near full charge and never be drained deeply.
The auxiliary battery does the opposite. It runs accessories for hours and gets recharged as you drive. Deep-cycle chemistry suits this job far better.
Keep the two separate and both last longer. That's the whole point of the system.
Dual Battery Isolator vs DC-DC Charger: Which Charging Setup Fits Your Vehicle
A DC-DC charger is the better choice for most modern 4WDs, because it lifts and stabilises voltage to properly charge an auxiliary battery.
The difference comes down to voltage.
A DC-DC charger takes the alternator's input and converts it to a clean charging profile for your auxiliary battery.
Australian DC-DC charger and wiring guidance from REDARC explains how charging profiles differ between battery types.
If you're also running solar, a DC-DC charger with a solar input lets one unit manage both. Our guide to solar panel setups for off-grid camping pairs well with this.
Choosing Your Battery Type and Capacity Before You Buy
Match battery chemistry to your charger first, then size the capacity to your load.
Work out your daily draw in amp-hours. A fridge might pull 30-50Ah a day in warm weather, plus lights and phone charging.
- Lithium (LiFePO4): lighter, deep-cycle friendly, needs a compatible charger
- AGM: sealed, affordable, heavier for the same capacity
- Gel: sealed and vibration-tolerant, slower to charge
For a serious setup, the VoltX 12V Lithium Battery 200Ah Plus gives 200Ah with a built-in battery management system and up to 3,000 lifecycles. If you want a lighter, more affordable start, the VoltX 12V Lithium Battery 100Ah weighs around 13.5kg.


Watch out: a lithium battery needs a charger with a lithium profile. Pairing one with an old isolator can leave it half-charged and shorten its life.
Where to Mount the Second Battery: Under-Bonnet, Canopy, Tub or Cabin
Mount the auxiliary battery as close to the charger as practical, in a spot that stays cool, dry and secure.
Under-Bonnet
Convenient for short cable runs and keeps the battery out of the cabin. But engine bays are hot, sustained temperatures above 50°C shorten lead-acid battery life significantly, and lithium batteries have their own temperature limits (most LiFePO4 units should not charge below 0°C or above 45°C).
- Check the battery's temperature specification before choosing under-bonnet.
- Keep the battery away from exhaust manifolds and turbochargers.
- Use a heat shield if the only available spot is near a heat source.
Canopy or Tub
Cooler, more spacious, and better for larger batteries and lithium units. The trade-off is a longer cable run, which means thicker cable and careful voltage-drop calculation (see the cable sizing section).
- Mount the battery in a sealed battery box if it is in an open tub, to protect it from dust and water.
- Bolt the tray through the tub floor using reinforcing plates underneath.
- Keep the battery away from the fridge slide's moving parts.
Cabin
Keeps the battery dry and secure, but introduces safety considerations. A battery inside the cabin must be in a sealed, vented box, lead-acid batteries can emit hydrogen gas, and lithium batteries can vent in a fault condition. Proper containment remains essential for maintaining the integrity of these energy storage units, a principle that extends to the broader implementation of backup power solutions for domestic appliances.
- Use a sealed battery box with an external vent.
- Do not mount a battery where it could become a projectile in a crash.
- Route cables away from airbag deployment zones and seat mechanisms.
Restraint and Legal Considerations
Whatever location you choose, the battery must be mechanically restrained so it cannot move in a crash or during off-road driving. A loose battery is a fire risk, a short-circuit risk, and a roadworthy defect.
- Use a proper battery tray or bracket bolted to structural metal.
- Use a hold-down clamp that grips the battery base, not just a strap over the top.
- Check your state or territory roadworthy requirements before fitting a battery.
If you are unsure about structural mounting points, have an auto-electrician or 4WD accessory fitter inspect the location before you drill.
Dual Battery System Cable Size, Fuses and Voltage Drop
Cable sizing is where most DIY dual battery installs go wrong. Too thin and you lose charging voltage; too thick and you waste money and struggle to route the cable. The goal is to keep voltage drop across the positive and earth return under about 3% at your charger's rated input current.
VoltX 12V Lithium Battery 200Ah Plus →
Work Out Your Current First
Your charger's maximum input current is the number that matters. A 25A DC-DC charger can draw up to 25A from the starter battery, so size the cable for 25A, not for the charger's output rating. Check the charger's spec sheet for its maximum input current.
Voltage Drop Calculation
Voltage drop is calculated over the full round trip, positive cable plus earth return. Use this formula:
Vdrop = (2 × L × I × R) / 1000
Where:
- L = one-way cable length in metres
- I = current in amps
- R = cable resistance in ohms per metre (from the cable manufacturer's data)
As a practical shortcut, most auto-electrical suppliers publish resistance figures per metre for common cable sizes. For a 12V system, a 3% drop is 0.36V. If your charger needs at least 12.0V at its input to start charging, and your alternator produces 13.8V, you have 1.8V of headroom, but smart alternators can drop to 12.5V, leaving only 0.5V. That is why long runs to a tub or canopy often need 16mm² or larger.
Worked Example
A 25A charger mounted in the tub, 5 metres from the starter battery, using 16mm² cable with a resistance of about 0.0012 ohms per metre:
Vdrop = (2 × 5 × 25 × 0.0012) / 1000 = 0.3V
That is under 3% of 12V, so 16mm² is adequate. If the run were 8 metres, the drop would be 0.48V, too much for a smart alternator, so you would step up to 25mm².
Fuse Selection
Fuse both ends of the positive cable. The fuse protects the cable, not the device, so its rating must be below the cable's current-carrying capacity but above the charger's maximum input current.
- Starter battery end: fit a fuse within 300mm of the positive terminal. For a 25A charger on 16mm² cable, a 40A or 50A fuse is typical.
- Auxiliary battery end: fit a fuse or breaker close to the auxiliary positive terminal, sized to protect the cable between charger and battery.
- Accessory circuits: fuse each accessory separately at the auxiliary battery.
Use ANL, MIDI, or MEGA fuses for main runs, blade fuses are not rated for the continuous current of a charging circuit. Fit them in a proper holder, not inline tape.
Cable and Connection Practicalities
- Use flexible multi-strand cable rated for automotive use, not household wire.
- Crimp lugs with a proper crimping tool and seal with heat-shrink.
- Run cable through grommets wherever it passes through metal.
If you are unsure of your calculations, most auto-electricians will check your cable and fuse sizing for a modest fee, far cheaper than a melted loom.
Step-by-Step DC-DC Charger Installation and Wiring Sequence
Installing a DC-DC charger follows a fixed order: mount the components, run and fuse the cable, connect the charger, then connect the batteries. Work with the main battery disconnected.
- Mount the charger in a cool, dry spot near the auxiliary battery.
- Mount the battery tray and secure the auxiliary battery.
- Run the positive cable from the starter battery to the charger, through a grommet.
- Fit fuses at both ends of the positive run.
- Connect the earth from the charger and auxiliary battery to a clean chassis point.
- Wire the charger's ignition trigger so it only charges when the engine runs.
- Connect the auxiliary battery to the charger output.
- Reconnect the main battery and check every connection is tight.
Take your time on the earth connection. A poor earth causes low voltage and strange charging faults.
Dual Battery System Wiring Diagram: What Each Connection Does
A dual battery system wiring diagram shows four core connections: starter battery positive to charger input, charger output to auxiliary battery, earths to chassis, and an ignition trigger to switch charging on. Each one has a job.
- Starter positive to charger input: feeds charging current from the alternator
- Charger output to auxiliary positive: charges the second battery
- Earths to chassis: complete the circuit for both batteries and the charger
Sketch your own diagram before you cut any cable. It forces you to plan the fuse positions and earth points, and it makes fault-finding far easier later.
Commissioning, Testing and Troubleshooting Your New Setup
Test the system before your first trip: check charging voltage at the auxiliary battery with the engine running, then confirm the fridge runs and the starter still cranks. A healthy DC-DC setup should show a rising voltage at the auxiliary battery within a minute of start-up.
Common faults and fixes:
| Problem | Likely cause | Fix |
|---|---|---|
| Auxiliary battery won't charge | Blown fuse or poor earth | Check fuses, clean earth point |
| Charger cuts in and out | Voltage drop on long cable run | Fit thicker cable |
| Battery drains overnight | Accessory left on, or no isolation | Check loads, confirm charger isolates |
| Slow charging | Undersized cable or wrong profile | Upsize cable, set correct profile |
Run a full test at home before you rely on the system out bush. Pack a multimeter and spare fuses.
Frequently Asked Questions
What do I need to install a dual battery system in a 4WD?
You need an auxiliary battery, a battery tray or box, a DC-DC charger or voltage-sensitive relay, cable sized for your run length, fuses or circuit breakers, terminals, lugs and a crimping tool. Add heat-shrink, split loom and a multimeter for testing. If you mount the battery in the cabin or canopy, allow for a vented box and a secure mounting plate. Budget for roughly half a day if it is your first install, and check your vehicle's warranty terms before drilling any panels.
Do I need a DC-DC charger for a dual battery system?
A DC-DC charger is the safer choice for most modern 4WDs. Variable-voltage alternators often drop below 13V once the starter battery is topped up, which leaves a voltage-sensitive relay unable to charge a lithium or deeply cycled AGM properly. A DC-DC charger takes whatever voltage the alternator supplies and lifts it to the correct charging profile for your battery chemistry. A VSR still suits older vehicles with fixed-voltage alternators and short cable runs to a lead-acid auxiliary.
What size cable do I need for a 4WD dual battery system?
Size the cable for current and voltage drop, not just fit. A 6mm² cable suits short runs up to about 3 metres carrying 30A, while 16mm² or larger is needed for long runs to a rear canopy at 40-50A. Keep total voltage drop under 3% so the charger sees enough input. Always fuse at the starter battery end, within 300mm of the positive terminal, and match the fuse to the cable's current rating rather than the charger's output.
Can I install a dual battery system myself?
Yes, if you are comfortable with basic 12V wiring, can crimp heavy lugs properly and know how to isolate the starter battery before starting. The job involves mounting a tray, running cable through the firewall or chassis, fitting fuses and connecting a charger. If you are unsure about cable sizing, alternator behaviour or drilling into a chassis rail, have an auto electrician handle the charging circuit. Poor terminations and undersized cable cause most failures, not the components themselves.
Getting a dual battery system right comes down to three things: the right battery, thick enough cable, and a charger matched to your chemistry. Get those wrong and you'll fight flat fridges all trip.
At Budget Roo, we stock the batteries, fridges and gear that make these setups work. Our VoltX lithium range pairs with a DC-DC charger, and our portable fridges give you a real load to plan around. Shop now and build a setup that keeps the cold ones cold and the engine starting.
