

Table of Contents
- Step 1: Gather Your Cleaning Supplies and Set Up
- Step 2: How to Clean Camping Gear: Tents and Shelters
- How to Remove Mould from Tent Fabric
- How to Wash a Sleeping Bag Without Ruining It
- Backpack Maintenance and Cleaning
- Camping Gear Storage Tips for Longevity
- Repairing Minor Damage and Eco-Friendly Disposal
- Frequently Asked Questions
Last Updated: September 16, 2026
Step 1: Gather Your Cleaning Supplies and Set Up
Getting the right kit together before you touch a single tent pole is the difference between a quick refresh and a ruined seam. Learning how to clean camping gear starts with supplies, not scrubbing.
You need a soft-bristled brush, two buckets, a sponge, and a mild detergent or technical wash. Skip anything with bleach, fabric softener, or harsh solvents. A garden hose with a gentle spray setting works better than a high-pressure nozzle, which can force water through waterproof coating.
Set up on grass or a tarp, never on concrete or gravel that can abrade fabric. Work in shade if you can, since direct sun makes detergent dry too fast and leaves residue.
Budget Roo Pty Ltd stocks practical camp kitchen and outdoor gear, and the same principle applies across the range: mild products and gentle handling protect your investment far better than aggressive cleaning.

A quick supply checklist:
- Soft-bristled brush and sponge
- Two buckets (one soapy, one rinse)
- Mild detergent or technical wash
- Garden hose with gentle spray
- Microfibre cloths
- Drying line or clean tarp
Step 2: How to Clean Camping Gear: Tents and Shelters
Tents need spot treatment first and a full wash only when genuinely dirty. Most campers over-wash their shelters, which strips the DWR finish and shortens the life of the fabric.
Start by shaking out debris, then wiping down the fly and floor with a damp sponge. For mud, let it dry completely, then brush it off rather than scrubbing wet. Wet scrubbing pushes dirt into the weave.
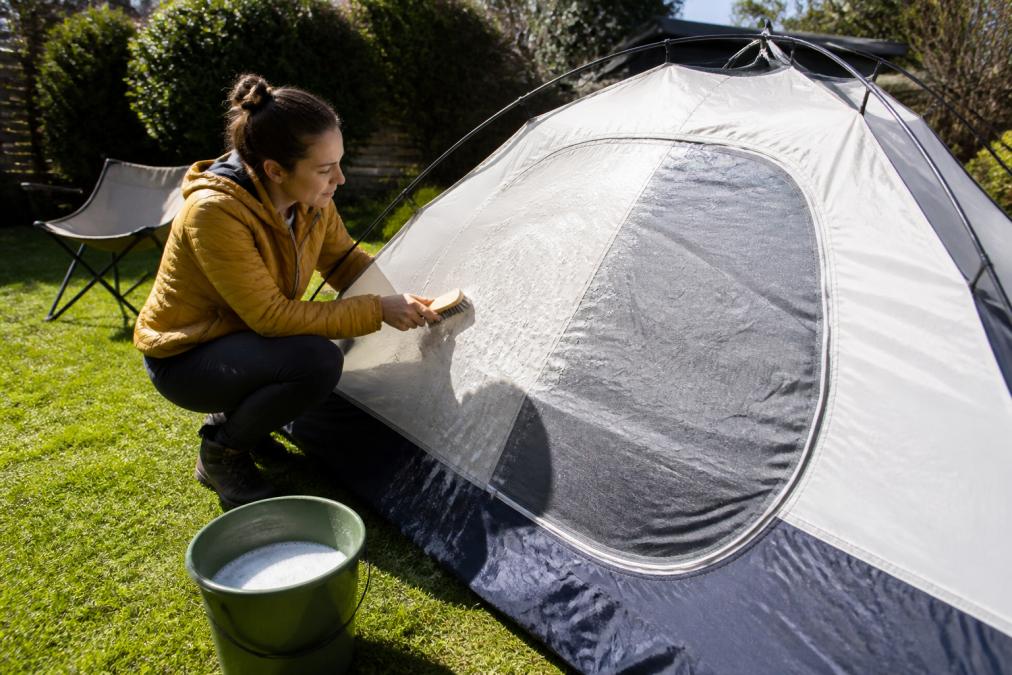
If a full wash is needed, pitch the tent or lay it flat, sponge on mild soapy water, and rinse thoroughly.
Spot Cleaning vs Deep Cleaning
Spot cleaning handles isolated marks: bird droppings, sap, or a muddy patch. Deep cleaning is a full-panel wash, and it should happen rarely, perhaps once a season at most.
How to Remove Mould from Tent Fabric
Mould on tent fabric is treatable if you catch it early. Mix a weak solution of white vinegar and water, sponge it onto the affected area, and let it sit for a few minutes before rinsing.
Preventing Mildew with Proper Drying
Mildew prevention comes down to one rule: never pack a tent away damp. Even slightly damp fabric in a storage bag creates the warm, dark, humid conditions mould needs.
How to Wash a Sleeping Bag Without Ruining It
Most sleeping bags can be washed, but the method depends entirely on the insulation. Getting this wrong is the fastest way to destroy loft and warmth, and a bag that has lost its loft will never keep you as warm as it did when new.
Outdoor Free Standing Kitchen Sink →
Synthetic vs Down Insulation Care
Synthetic bags are forgiving. Use a front-loading machine on a gentle cycle with mild detergent and lukewarm water, then tumble dry on low with a couple of clean tennis balls to restore loft. Top-loading machines with a central agitator are the main risk here: the agitator can tear baffles and bunch the fill into lumps. If a front-loader is not available, hand-wash in a bathtub instead.
| Insulation | Wash Method | Drying | Key Risk |
|---|---|---|---|
| Synthetic | Gentle cycle, mild detergent, front-loader preferred | Low tumble with tennis balls | Losing loft if over-washed or agitated |
| Down | Down-specific wash, gentle cycle, no detergent | Low heat, long cycle, break up clumps by hand | Clumping and mildew if dried poorly |
Washing a Down Bag: Step by Step
- Close all zips and fasten any hook-and-loop closures so they do not snag the shell.
- Fill a front-loader or bathtub with lukewarm water and add a down-specific wash.
- Submerge the bag and gently knead it, do not wring, twist or scrub, which damages baffles.
- Rinse until the water runs clear. Residual detergent attracts moisture and shortens the life of the fill.
- Press water out by hand, then transfer the bag to the dryer. Do not lift a soaked down bag by one end; the weight of the wet fill can tear baffles.
- Tumble dry on low with two or three clean tennis balls, pausing every 20-30 minutes to break up clumps by hand.
Spot Cleaning Between Washes
You do not need to wash a sleeping bag after every trip. Spot-clean body oils, food spills and sunscreen marks with a damp cloth and a drop of mild soap, then air dry. Body oils are the main cause of lost loft over time, so a quick wipe of the hood and collar after each trip does more for longevity than a full wash once a year.
Backpack Maintenance and Cleaning
Backpacks collect sweat, dust, and food crumbs, and zippers are usually the first thing to fail. Empty every pocket, shake out debris, and hand-wash the pack in a tub of lukewarm water with mild soap.
Camping Gear Storage Tips for Longevity
Camping gear storage tips usually boil down to three things: clean, dry, and loose. Store everything clean, completely dry, and uncompressed in a cool, dry place away from direct sunlight.
Repairing Minor Damage and Eco-Friendly Disposal
Small tears and pulled seams are worth repairing before they spread. A patch kit and seam sealer handle most fabric damage, and a replacement zip slider fixes the most common hardware failure. The trick is to repair early: a pinhole in a tent floor becomes a rip the first time you kneel on it, and a frayed seam becomes a leak the first time it rains.
Repairing Fabric, Seams and Zips
- Tears in tent fabric or sleeping bag shells: clean the area, let it dry, then apply a self-adhesive patch or a patch with seam sealer over the edges. Round the corners of the patch so it does not peel up.
- Pulled seams: re-seal with a seam sealer designed for the fabric. Silicone-coated fabrics need a silicone-based sealer; polyurethane-coated fabrics need a polyurethane sealer. Mixing the two is a common mistake and the seal will not bond.
- Zips: a replacement slider is often all that is needed. If the teeth are damaged, a zip repair kit or a professional repair service is cheaper than replacing the whole item.
- Poles and pegs: replace shock cord and bent pegs rather than forcing them. A bent pole section can puncture the sleeve on the next pitch.
Eco-Friendly Disposal and Greywater
This is where most guides stop, and it is where the real environmental impact sits. Greywater from washing gear should never go straight into a creek, river, storm drain or lake. Detergents, even mild or biodegradable ones, harm aquatic life, and the dirt, sunscreen and food residue you are rinsing off are pollutants too. Proper disposal methods remain just as critical when washing hunting gear to ensure that scent-masking agents and field debris do not compromise the delicate balance of local watersheds.
Building a Small Gear Repair and Cleaning Kit
A dedicated kit means you actually repair things instead of putting them off. A practical setup includes:
- A patch kit for fabric and a tube of seam sealer matched to your fabric coating
- Spare zip sliders in the sizes your tent and pack use
- A soft-bristled brush, microfibre cloths and a small bottle of mild or technical wash
- Silicone-based lubricant for zips
- A spare set of shock cord and a couple of replacement pegs
Frequently Asked Questions
Can you hose down a tent to clean it?
You can rinse a tent with a hose on a low-pressure setting, but avoid high-pressure sprays that can damage the waterproof coating and seams. For general cleaning, spot clean with lukewarm water and a mild detergent instead. Always air dry completely in the shade before storing to prevent mildew.
Can you use a washing machine for sleeping bags?
Most synthetic sleeping bags can go in a front-loading washing machine on a gentle cycle with lukewarm water and mild detergent. Down bags need a specialised technical wash. Never use a top-loader with an agitator, as it can tear the fabric and clump insulation. Always air dry thoroughly before storage.
How do you remove mould from camping equipment?
For tents and fabrics, mix a solution of white vinegar and water, apply to affected areas, and scrub gently with a soft brush. Rinse well and dry completely in the shade. Store gear dry in a cool, ventilated space to prevent recurrence.
How should I store my camping gear to prevent damage?
Store gear clean and completely dry in a cool, dry place away from direct sunlight. Use breathable storage bags rather than airtight containers for sleeping bags and tents to allow ventilation. Keep gear off concrete floors, and avoid compressing sleeping bags for long periods. Check periodically for moisture or pests.